Modern barn ‘conversion’ style self-build
A rural setting was never high up on their list when Chris and Natasha began their search for a self-build plot. But, today, as they gaze out from the corner floor-to-ceiling window in their living room, the couple breathe a sigh of relief as they take in the charming countryside views.
Natasha explains: “We’re both from Suffolk and have always lived in towns due to work, so ideally we wanted to find a plot close to Ipswich. We started our search and found a plot in a small rural village around 13 miles away – it was a great spot so we decided to compromise slightly on location. At first we were worried we’d be too far away from the town centre but it’s actually lovely to be in the countryside. One of the things we definitely learnt on our self-build journey is that sometimes you need to compromise!”.
How do you find land in the first place? Natasha adds: “We signed up to a few land sale websites and found ours on Plot Browser but we also told local agents that we were seeking land and took walks around desired areas to check for potential plots.
“We knew we wanted more space but hadn’t defined the design of the house yet as this would be dictated by the plot. We already had planning permission but had to resubmit to meet our requirements. There was a cabinet makers’ workshop on the plot of land that we purchased, which was a huge bonus as water and electricity were already installed on site. We demolished the workshop and everything we could recycle such as the insulation, stud work and osb boarding was used to build a permanent shed in the garden.”
Learn more about self-building through deconstruction in our blog here.
Why self-build?
Embarking on a self-build project seemed the natural step after the pair had renovated their former three bed semi-detached home. The couple were no strangers to getting their hands dirty.
Natasha says: “We bought a property in 2010 and renovated this. I was keen to move to another ‘ready-made’ home but Chris wanted a renovation project and to take a hands-on approach.
Chris and his dad Andy, who is an electrician, worked on their previous renovation so both had amassed some general building knowledge while employing qualified plasterers and tilers.
“We project managed the renovation in our last house but I gained enough knowledge and I was eager to go down the self-build route,” says Chris.
The process was filled with “lots of feelings”, describes Natasha, and plenty of ups and downs.
“We decided that we would only purchase the land if we could get the house we really wanted.”
There were a few delays in the exchange of contracts with land. But, as ever, with many self-build projects planning permission proved a struggle.
The house they proposed is closely situated to a number of Grade II listed properties which meant the couple had to compromise on roof height and cladding materials. After numerous iterations when it came to the drawings the couple decided to avoid massive changes to plans later on. Their proposal for a cosy log burner was rejected – they were not allowed to have one as it was refused by conservation officers. Many parts of the UK are smoke control areas where you can’t emit smoke from a chimney unless you’re burning an authorised fuel or using ‘exempt appliances’, for example burners or stoves.
“It was frustrating to come up against these initial setbacks but we were keen to plough ahead and had to adhere to all the changes that came as a result of where the plot is located,” says Natasha.
A year after first finding their plot and nine drawings later, planning permission was granted in March 2017. The build finally commenced in November 2017. The plan was to build a brick and block construction after a timber frame was rejected due to the flood risk on the plot.
It was all systems go as Chris’s contacts came into force. He knew various tradespeople from his previous experiences, calling on the help of a groundworker to clear the site, lay foundations, install drainage and other pipework. A lot of concrete was removed from under the workshops before foundations could be dug, remembers Natasha. Poor soil quality meant extensive digging of the foundations and 1.1 metres of concrete was laid with reinforcing wire throughout. A block and beam floor was used to ensure the weight sits on the footings instead of the ground.
Chris explains: “We employed individuals and managed them – we were fortunate enough to have found roofers, carpenters and my dad was a great help throughout the process. I actually learnt a lot of basic wiring and some plumbing. I even learnt a bit about carpentry and roofing. It has been a real learning curve.”
However, Chris didn’t stop there. He even installed the MVHR (Mechanical Ventilation with Heat Recovery system) to take the heat from the air leaving the building and transfer it to the incoming fresh air which is put into the house.
“We wanted a fairly airtight house and, yes it’s an expense, but the cost outweighs the benefits, in my opinion. We also installed underfloor heating and an Omnie system and opted for an air source heat pump which cost £13,000. We don’t have mains gas so we opted for the heat pump which, with the government’s renewable heat incentive scheme, will pay back over seven years. It seemed the logical choice.”
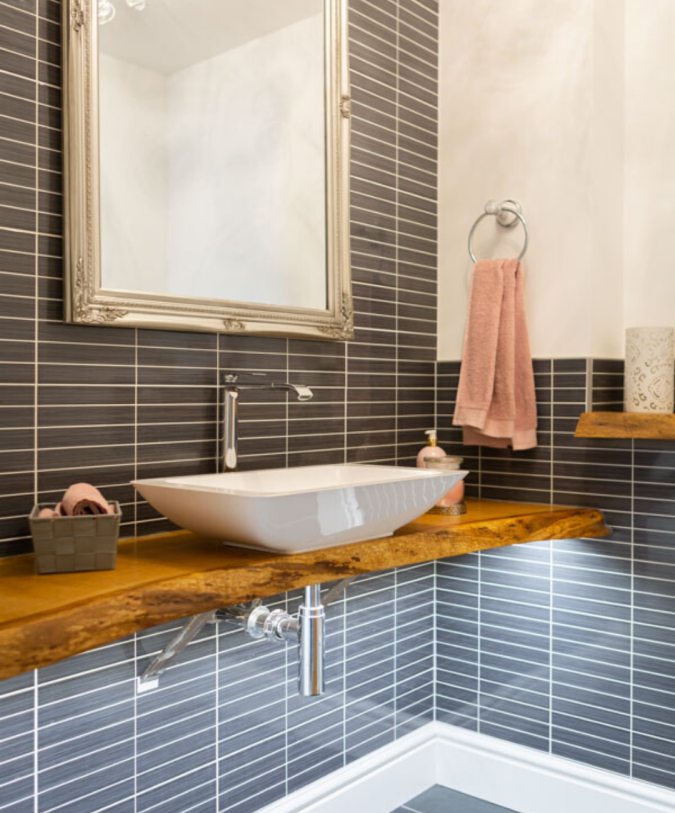
When it came to materials the couple approached a local merchant, Coastal Building Supplies, which delivered almost everything on their project. Natasha and Chris found it easier to shop and receive materials from one place. Elsewhere, the couple used Saint-Gobain Gyproc plaster to provide a low maintenance internal surface finish throughout the house and they sourced tiles for their cloakroom from CTD tiles.
Natasha’s job as a Finance Manager meant that looking at cash flow was high on the agenda. The couple used an online estimating service as a starting point to work out cost of bricks/quantities. “It was a great starting point, giving us a way to flex our budget,” says Natasha.
The home straight
Chris, who works as an auditor, handed in his notice at the end of July 2018 to concentrate on project managing and building the house.
He says: “We were at a point where I wanted to be of more use at home as it had become a consuming project. I felt by project managing more I could be present, take deliveries and smaller jobs – like carry plasterboard into the house!
“Life changed as I was getting to site at 7.30am and not leaving until 6.30pm. It really takes over your life and you do need to sacrifice your evenings and weekends looking at invoices and planning. It can take its toll.”
Almost three years on from finding their self-build plot, Natasha and Chris are finally home. Their spacious two-storey four-bedroom home with its high quality finishes is everything they wanted.
The finished exterior is impressive to behold. The house features black feather edge cladding with floor-to-ceiling glazing in the corner of the lounge. Three different roof heights are used across the house to adhere to planning regulations but equally adding immediate character. The complex hand cut roof meant all of the timbers were individually cut to sit to the steel beam and wall plate.
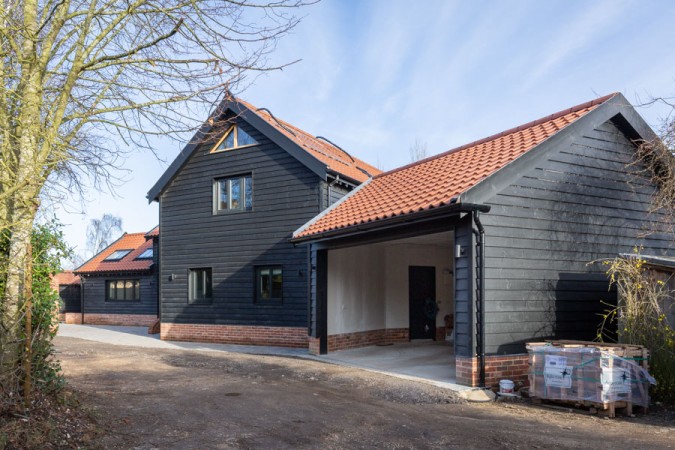
A neighbour’s recommendation helped the couple to find a bricklayer who helped to lay the Vandersanden Maltings Antique brickwork with white cement – to remain sympathetic to the surrounding Grade II properties.
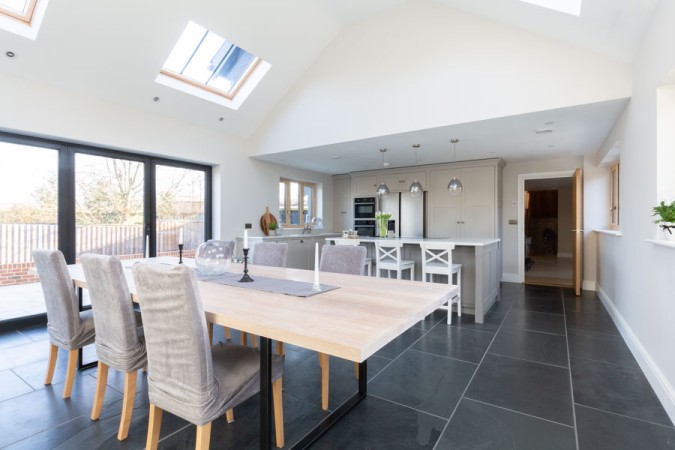
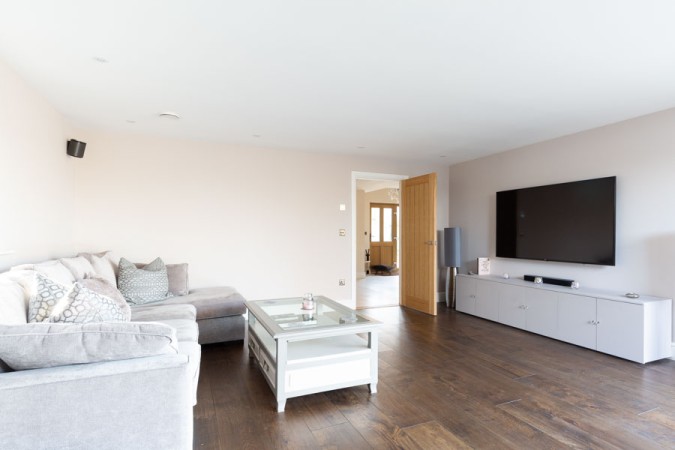
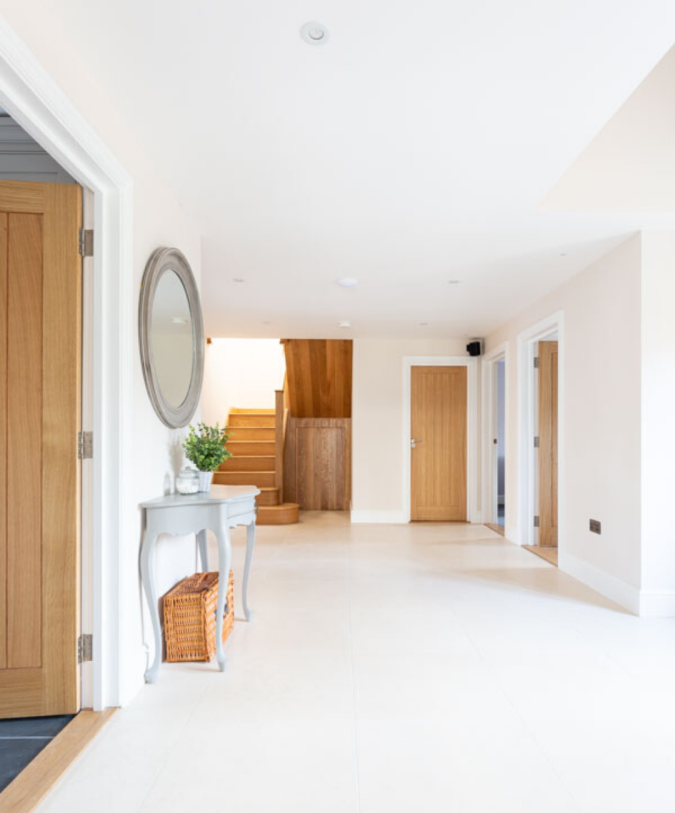
Inside, the ground floor flows seamlessly and features a small cloakroom area, study and utility room.
Upstairs, the first floor features four double bedrooms and a large family-sized bathroom finished in Manhattan polished marble. The en suite in the second bedroom is finished in silver with white matt tiles – complete with a walk-in wardrobe in the master bedroom finished in plush tiling.
The whole house has floor and ceiling insulation – a costly addition – but having a warm home was high on the list. Every inch of their home is well considered with well-thought out corridors to maximise space.
The outside has yet to be landscaped fully, with only the back garden patio and front block paving completed so far, but the couple hope to finish this by spring 2020.
Reflecting on their journey, the couple are pleased with the outcome. But would they do anything differently? Natasha says: “I wish we had planned interiors much earlier than we did in the process as it put us in situations where we had to make quick decisions so that work could keep progressing. I also wish we’d laid some hardcore (aggregate) around the site earlier to make it easier to walk around and get vehicles through so that there was a little less mud to contend with!”
Their experiences have ignited a new found passion – particularly for Chris. He hopes everything he has learnt along the way will help with future projects. His goal is to remortgage the house to build the next one.
He ends: “There’s no denying that this has been a difficult process and very demanding of time and money but we’ve learnt so much. It has been a learning curve and I have discovered that you need to be assertive and committed. I can’t wait for the next project…”
Follow the couple’s journey on Instagram: suffolkselfbuild.
Natasha's top tips for self-builders:
- Don’t try to do all the work yourself. Time is money.
- Don’t struggle and feel demoralised. Get as many tradespeople in to help as your budget allows. We ended up making great friends from this.
- Be realistic about your budget, plan carefully for items. Our budget spiralled as we wanted to achieve a high quality finish.
Confessions of a self-builder: Part 2
James Mason is building his second self-build home, follow him on his journey.
